
Terraform With Azure
Using Terraform with Azure
This post is a quick walkthrough of how you can use Terraform with Azure, replacing the need to create all the required infrastructure manually through either the Azure Portal or the CLI.
What Is Terraform?
If you’re not familiar with Terraform, it’s an IaC (Infrastructure as Code) tool which allows you to define the infrastructure your application requires to run on within a set of files you can place within the code repository. Why is that so useful? Alongside similar workflow tools such as Docs as Code, it allows you to:
- Stay within your code editor to define the configurations
- Keep things centralized and source controlled
- Define multiple environments without replication
- Can be used within deployment pipelines
- Spin up quick proof of concepts
- Easily and quickly delete redundant resources
Amongst others. Let’s dig a bit deeper and see just how easy it is to utilize.
Installation
On Windows, you will want to download the latest binary and extract that to a location available on your PATH env variable, or optionally place it somewhere else and add that location to your PATH so your CLI of choice can run the terraform commands.
Files and Conventions
Although you can put all the terraform config in a single file, I’d recommend splitting them out into the following:
project/
    infra/            # Top level containing folder - named whatever
        providers.tf  # Define provider
        main.tf       # Define resources to create
        variables.tf  # Variables to use within the resources
        outputs.tf    # Store the output of the results of applying the terraform
Nothing special as you can see but it does make the intent clearer to any other developer working on or viewing the repository.
Example definition
As we are using Azure, the provider we want to use can be defined as follows in our main.tf file:
// main.tf
terraform {
  required_providers {
    azurerm = {
      source  = "hashicorp/azurerm"
      version = ">= 4.6.0"
    }
  }

  required_version = ">= 1.14.5"
}
The remainder of the file is to define all the required resources we are going to need to run our function app (or any other type). We will need, typically:
- A resource group
- Storage account
- Storage container
- App Insights
- Service Plan
Finally, you will want to define the application resource - function app, web app, SWA, etc. In the example below I have used a Linux based function app on a flex consumption plan:
resource "azurerm_resource_group" "rg" {
  name     = var.resource_group_name
  location = "location"
}

resource "azurerm_storage_account" "sa" {
  name                     = var.storage_account_name
  resource_group_name      = azurerm_resource_group.rg.name
  location                 = azurerm_resource_group.rg.location
  account_tier             = "Standard"
  account_replication_type = "LRS"
}

resource "azurerm_storage_container" "sc" {
  name                  = var.storage_account_container
  storage_account_name  = azurerm_storage_account.sa.name
  container_access_type = "private"
}

resource "azurerm_application_insights" "ai" {
  name                = var.app_insights_name
  location            = azurerm_resource_group.rg.location
  resource_group_name = azurerm_resource_group.rg.name
  application_type    = "web"
}

resource "azurerm_service_plan" "sp" {
  name                = var.service_plan_name
  location            = azurerm_resource_group.rg.location
  resource_group_name = azurerm_resource_group.rg.name
  sku_name            = "FC1"
  os_type             = "Linux"
}

resource "azurerm_function_app_flex_consumption" "fa" {
  name                       = var.function_app_name
  location                   = azurerm_resource_group.rg.location
  resource_group_name        = azurerm_resource_group.rg.name
  service_plan_id            = azurerm_service_plan.sp.id
  storage_access_key         = azurerm_storage_account.sa.primary_access_key
  storage_authentication_type = "StorageAccountConnectionString"
  storage_container_type     = "blobContainer"
  storage_container_endpoint = "${azurerm_storage_account.sa.primary_blob_endpoint}${azurerm_storage_container.sc.name}"
  runtime_name = "dotnet-isolated"
  runtime_version = "10.0"

  site_config {}
}
As you can see, I’ve referenced all the names for each resource from the variables.tf file. A typical entry in that will be:
// variables.tf
variable "storage_account_name" {
  default = "your-name-here"
}
// .. other vars
Now that we have our definitions, we can use the terraform commands to see if they work.
Plan and Apply
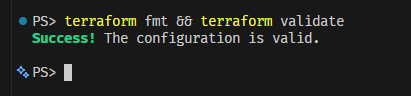
First, we can format and validate our definitions:
terraform fmt && terraform validate
If you have success as above, your next command will be to create the plan, which allows you to confirm what will be created is correct before you apply it to the portal (this will be outputted to the console):
terraform plan -out main.tfplan
After inspection of the plan, terraform indicates what the next step is:

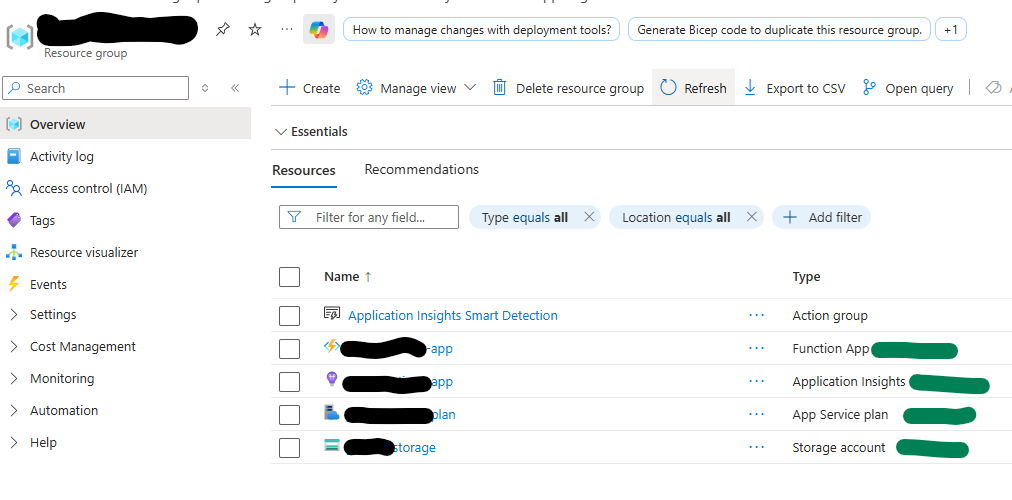
After executing this final step, you can then navigate to the portal to confirm your resource group is created, and all your resources defined underneath this group are there also:
What Next?
With our required infrastructure now in place, we can spend the rest of our time developing our app and then deploying it - whether it be function app, web app, or SWA. That process is outside the scope of this post but with VS Code or the Azure CLI this can also be done with minimal effort and the whole process from scratch to deployment really does represent modern rapid development.
You will also most likely want to perform this in either a Github Action or an Azure Pipeline for a real world project, integrating into your CI process.